When you make a table on your Word processor, each row can be expanded to show more information. If you only need a single row, it’s quicker to insert the table and delete any additional rows. The same can be said of tables created in Google Docs, the layout software from the search giant. We show you how to delete a table using this popular software.
There is no doubt that Google Docs is among the best platforms for creating and sharing documents. Not only does it support documents of all purposes, but it also allows users a plethora of formatting options.
This includes the ability to remove a table should you feel the need to use the document without it. In this article, we will look at some ways to get rid of a table in a Google Doc document using various platforms.
Step 1: Sign in to Google Docs. The first step is to sign in to Google Docs, that is if you aren’t signed in already. Enter your email address and password to navigate Google Docs.
Step 2: Open Document Containing Table. Once logged in, click on the document that contains the table you wish to delete.
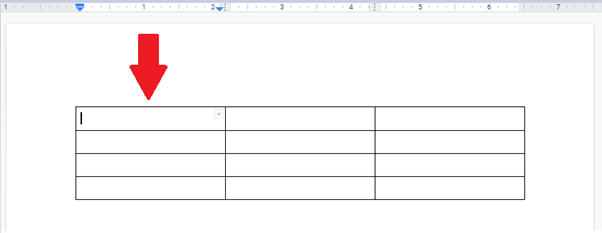
Step 3: Click Inside the Table. Click on the document’s table in order to select it.
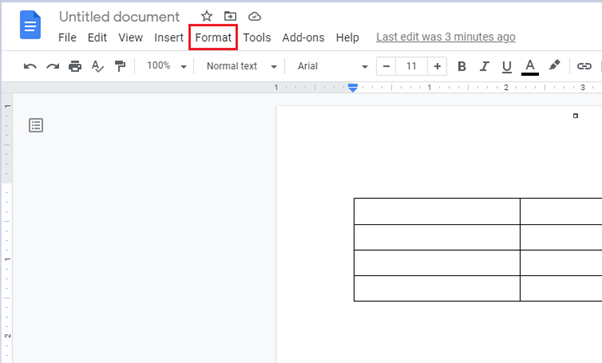
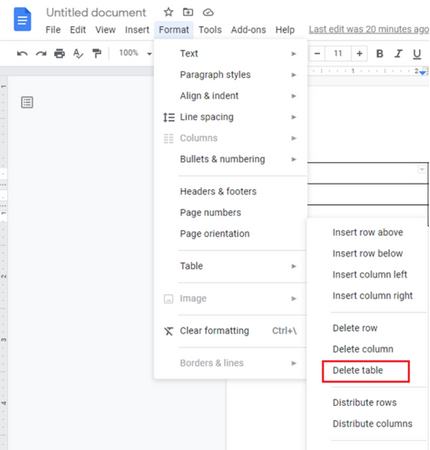
Step 4: Choose Table option. Select the Table option that is located at the top of the window page. Alternatively, you can press Ctrl whilst clicking the table.
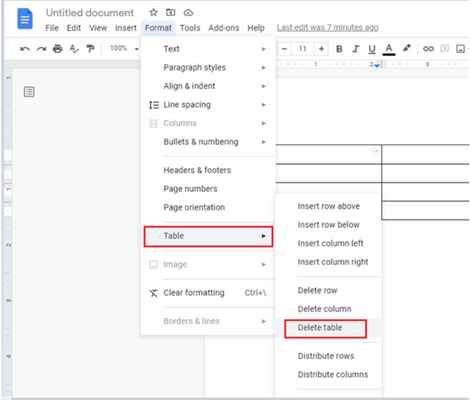
Step 5: Choose Delete Table option. When you choose the Table option, several options will appear from the menu. Choose the option that says delete table.
How to Delete Google Docs Table When Using PC
If you are using a PC, follow the steps below;
- Sign in to Google Docs. Just like the previous section, sign in to your Google Docs account in order to navigate the document and table that you want to remove.
- Select the Document. Click on the document that contains the table that you want to remove.
- Right-Click on the Table. Once you have opened the document, right-click on the table and hover over the options provided.
- Click on the Delete Table option. Select the Delete table option, and the table will be removed from the document.
How to Delete Google Docs Table When Using Android
Follow the steps below if you are opening the document using Android.
- Open the Google Docs app.
- Once you are signed in, tap the document that you intend to edit.
- Tap any part of the table until you see several options below the table.
- Tap the More option which has three dots.
- Once you do that, you will see the Delete table option. Tap on it, and this will instantly remove the table.
How to Delete Google Docs Table when using iOS
- Open the Google Docs app.
- Tap the document that you desire to edit.
- Once the document is open, tap on any part of the screen. This will give you option to edit your document.
- The edit icon that has a white pen in a blue circle will appear at the bottom right corner of the screen.
- Tap the table and select the Delete table option.
So, you see, deleting a table in Google Docs is just as easy as 123.
Summary: Delete a table in Google Docs
- Open a document in Google Docs, click on the table by accident.
- Click the layout options button that appears in the top right corner of the table.
- Click Delete Table in the drop down menu. A popup will appear to ask you to confirm that you want to delete the table.
- Click Yes and your table will be gone with all its contents deleted as well.