Windows 10 has finally arrived, and it brings a lot of new possibilities especially for those running the latest operating systems on their PCs or laptops. One example of this is the ability to prioritize your network connections, making sure that you always have the best speed possible when browsing the Internet, downloading files and more. I will show you how to do it in a few simple steps, so let’s get started!

If you have a Windows 10 device with several network adapters (i.e., Wi-Fi and Ethernet), each adapter will receive a certain value of priority to be used as a primary connection for your device.
However, even though Windows 10 may be good at prioritizing the most optimal connection, you may need to configure the adapters manually if you prefer one way over the other. This way, your choice of network adapter will automatically be prioritized without you needing to change or disconnect the other networks every time you use your device.
In this article, you will learn how to change the network connection priority to use your preferred adapter when you are connected to multiple networks.
Changing Network Priority Using Control Panel
One of the simplest ways of changing the network priority setting is by using the control panel. Here are the steps how:
- Go to your computer’s Settings option.
- Select Network & Internet, then go to Status.
- Under the Change your network settings, you will find the change adapter options. Click on that.
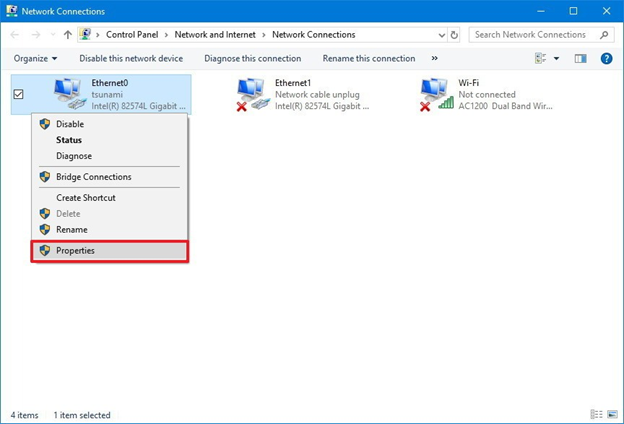
- The different network adapters available for your computer will then appear—right-click on your choice of an adapter. From the selection menu that will appear, click on Properties.
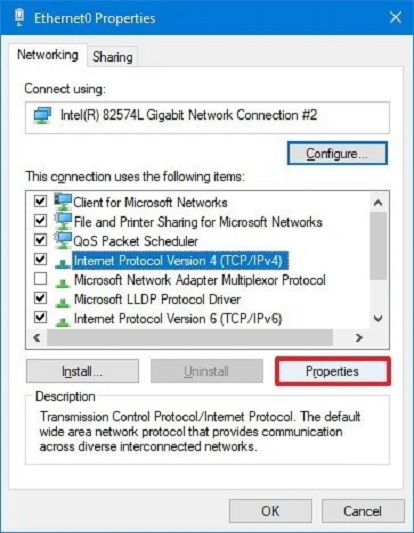
- Check the box for the Internet Protocol Version 4, then click on Properties.
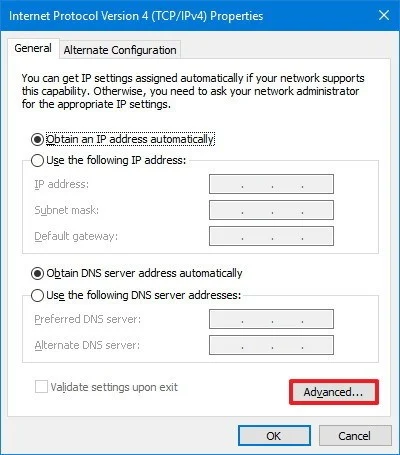
- Go to the general tab, then select the Advanced button.
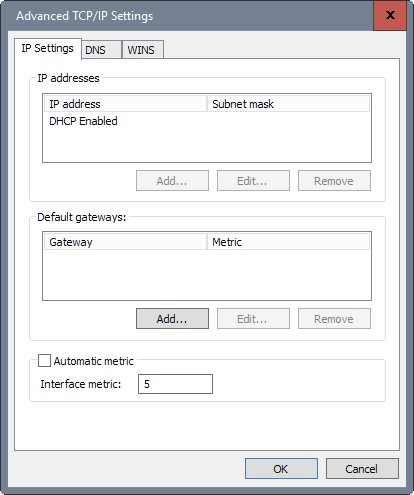
- Uncheck the automatic metric option, then in the interface metric field, assign the adapter with a priority value. When assigning a value, the lower number is equivalent to a higher priority and vice versa.
- Click on the OK button to save the changes. Another OK button will then appear, so click on that again.
After doing the steps mentioned above, your computer will now prioritize the network adapter of your choice. If you want to revert back to the default settings, you can simply follow the same steps except that you need to check the box for the Automatic metric mentioned in step no. 7.
Changing Network Priority Using Powershell
Another way of changing the network connection priority on your Windows 10 device is by using the Powershell tool. It is a configuration management framework tool that simplifies administration and configuration. It is free for home users and compatible not only with Windows 10 but also for Linux and MAC devices.
Here are the steps on how to change network priority using Powershell:
- Click on the Windows icon and type in Windows Powershell on the search bar. Click the top result, then Run as administrator.
- Input Get-NetIPInterface command to identify the current interface index number and interface metric, then press the enter key.
- After that, type these commands Set-NetIPInterface, -InterfaceIndex 21 and -InterfaceMetric 10. This will change the priority order of the network adapter. Hit the enter key afterward. Change the values in the command to prioritize your desired network adapter. Remember, the smaller the value is, the higher priority it will get.
- Type Get-NetIPInterface command to view the newly applied metric.
After finishing the 4 steps mentioned above, Windows 10 will start prioritizing the network adapter that you selected over the others available to your computer. Just like the first method, you can also revert back to the default automatic network prioritization at any given time.
Final Words
So, which method, in particular, do you think is easier to use when changing network connection priority on Windows 10? Many will probably say that the simplest method is using the control panel, and they are not wrong. However, if you have a little coding knowledge, using the Powershell tool can also be quick and easy.
Summary: Change network connection priority in Windows 10
- Open Network and Sharing Center.
- Click Change adapter settings.
- Right-click the adapter with the highest priority and select Status.
- In the Network Connection Status window, click Properties.
- Select Internet Protocol Version 4 (TCP/IPv4).
- Click Properties.
- Modify the interface metric value in Interface Metric section.
- Click OK to save changes, restart your computer and see if it works.
