How To Disable Internet Connection Without Disabling The LAN/Network?
888 Views
 When it comes to computers, internet connection is the most important part. As we all use internet in our daily life, it’s impossible not to have an internet connection. Sometimes, we must disable our internet temporarily. Sometimes an interruption of service occurs and our internet gets disabled by itself. In these cases, you should be able to disable your internet connection without disabling anything else. Here are the steps which will guide you on how you can stop your Internet connectivity without stopping other things such as LAN, Wi-Fi or Bluetooth that might be connected to your system.
The “LAN” or “local area network” or simply the “Network” of your computer allows you to connect to the internet. Sometimes you may need to disable the internet connection. But you may not want to disable the LAN. It may be because you want to disable the internet for a particular software or app.
Whatever the reason is, without disabling the LAN, you can easily disable the internet connection. Here, I will show you a few methods that you can follow to do this.
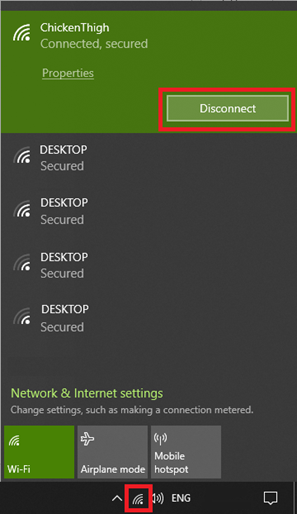
Disconnecting the Wire/Turning the Wi-Fi Off
You can disconnect the internet wire from your computer or turn of the Wi-Fi router to disable the internet connection. If you use a Wi-Fi connection to connect to the internet, you can turn off the Wi-Fi from Windows to disconnect. But sometimes others may need the Wi-Fi and so here are some other methods to follow.
Disabling Internet by Changing DNS
If you remove the DNS address from your computer network settings, you can disable your internet connection without disabling the LAN. To remove or change the DNS address, do the following:
- Open the control panel and then “Network and Sharing Center.”
- Click on “Change Adapter Settings” and then double-click on your connected network.
- Click on “Properties” from the newly opened Window.
- Find “Internet Protocol Version 4” under the “Networking” tab.
- Select it and click on “Properties.”
- In the bottom half, you will see two options, one of which is “Use the following DNS server addresses.”
- Select this and type a random DNS address.
- If you already have a DNS server, change it to another one that is not yours.
- Now click “Ok” and then close all the other windows.
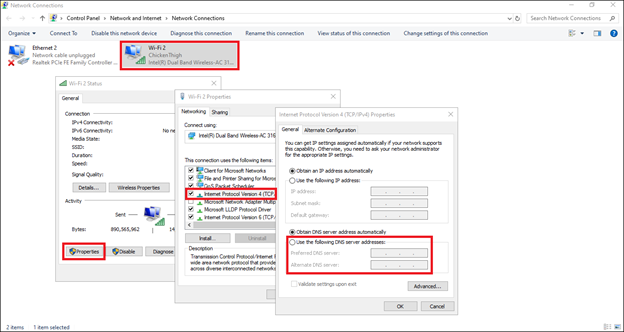
It will change your DNS address, and you can’t access the internet, but the LAN will still be enabled.
Disabling Internet for a Particular App
If you want to stop an app from accessing the internet, you can disable its permission in the Windows Defender Firewall. For this:
- Use Windows 10 search tool to search for “Windows Firewall” and open it.
- Alternatively, access the “Windows Defender Firewall” from the control panel.
- From the left side menu, click on “Allow an app or feature….”
- The list of apps with granted permissions will appear.
- There will be three checkboxes, one on the left of the app and two on the right.
- To prevent an app from accessing the “Private” network, uncheck the box under the “Private” column. The same goes for the “Public Network.”
- If you want to prevent the app from both the “Private” and “Public” network, uncheck the box on the app’s left.
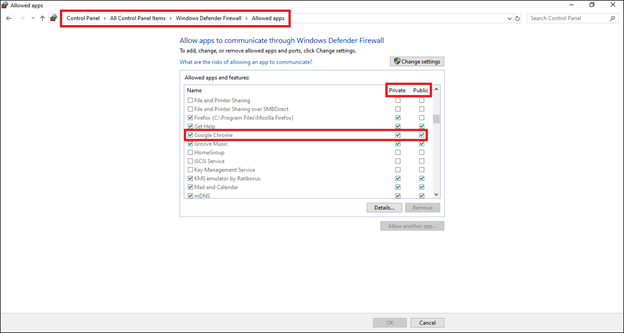
The app will no longer have access to the internet unless you grant permission again.
Using a Third-Party Tool
There are many third-party tools or software that you can use to disable the internet without disabling the LAN. The “Net Disabler” is one of this software. Here is how you can use it:
- Click here and download “Net Disabler” and install it on your computer.
- Launch “Net Disabler.”
- There will be three options.
- Select either one of these options by checking the box and click “apply the setting.”
- The best option would be to choose the “disable devices” option.
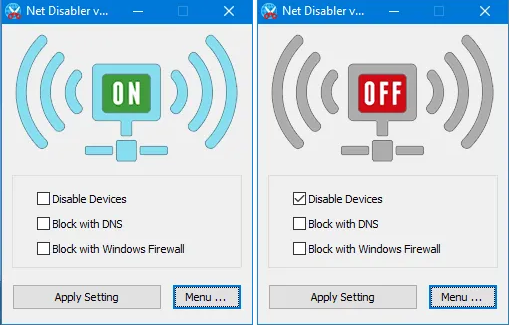
After applying the setting, you will no longer be able to access the internet unless you uncheck the box and “apply setting” again from “Net Disabler.”
Summary: Disable Internet Connection without Disabling the LAN/Network
- Go to Network and Sharing Center in Control Panel.
- Click on Change Adapter Settings.
- Right click on your LAN Connection and click Properties.
- Highlight Internet Protocol Version 4 (TCP/IPv4) from the list and click Properties under it.
- Select "Use the following DNS server addresses" and enter the following Preferred and Alternate DNS Server Address.
